
I’ve looked at buying shoe lasts many times, but always felt that they may not fit my feet terribly well. Made to measure is such a good way to go, but probably costs more.
The first thing I did was order some alginate. This is the stuff that dentists use to make moulds. It is quick setting and seemed to be just the ticket. I had no idea how much I needed so ordered three bags, thinking I might have enough left for Mark (I didn’t!).
The next thing is to get two boxes that fit my feet with an inch spare all round. If you live in Australia and are doing this, may I suggest going to Bunnings and trying on boxes? So much fun and the looks you get are so worth it! No photos of that escapade!
One of my boxes fitted perfectly but the second one was too long, so Mark did a little modification. May I say at this point that, as in most things, I could not have done this without my husband’s help.

Mark painted the inside of the boxes so that they wouldn’t absorb the liquid from the alginate. Plastic wrap or plastic bags would probably work well too.
The feet had to be coated in vaseline and I enjoyed this stage very much. I though I was being clever by putting plugs between my big toes and the next toe so I could have a gap in my last. Didn’t quite work as I planned, but a bit of carving, and the end result was satisfactory.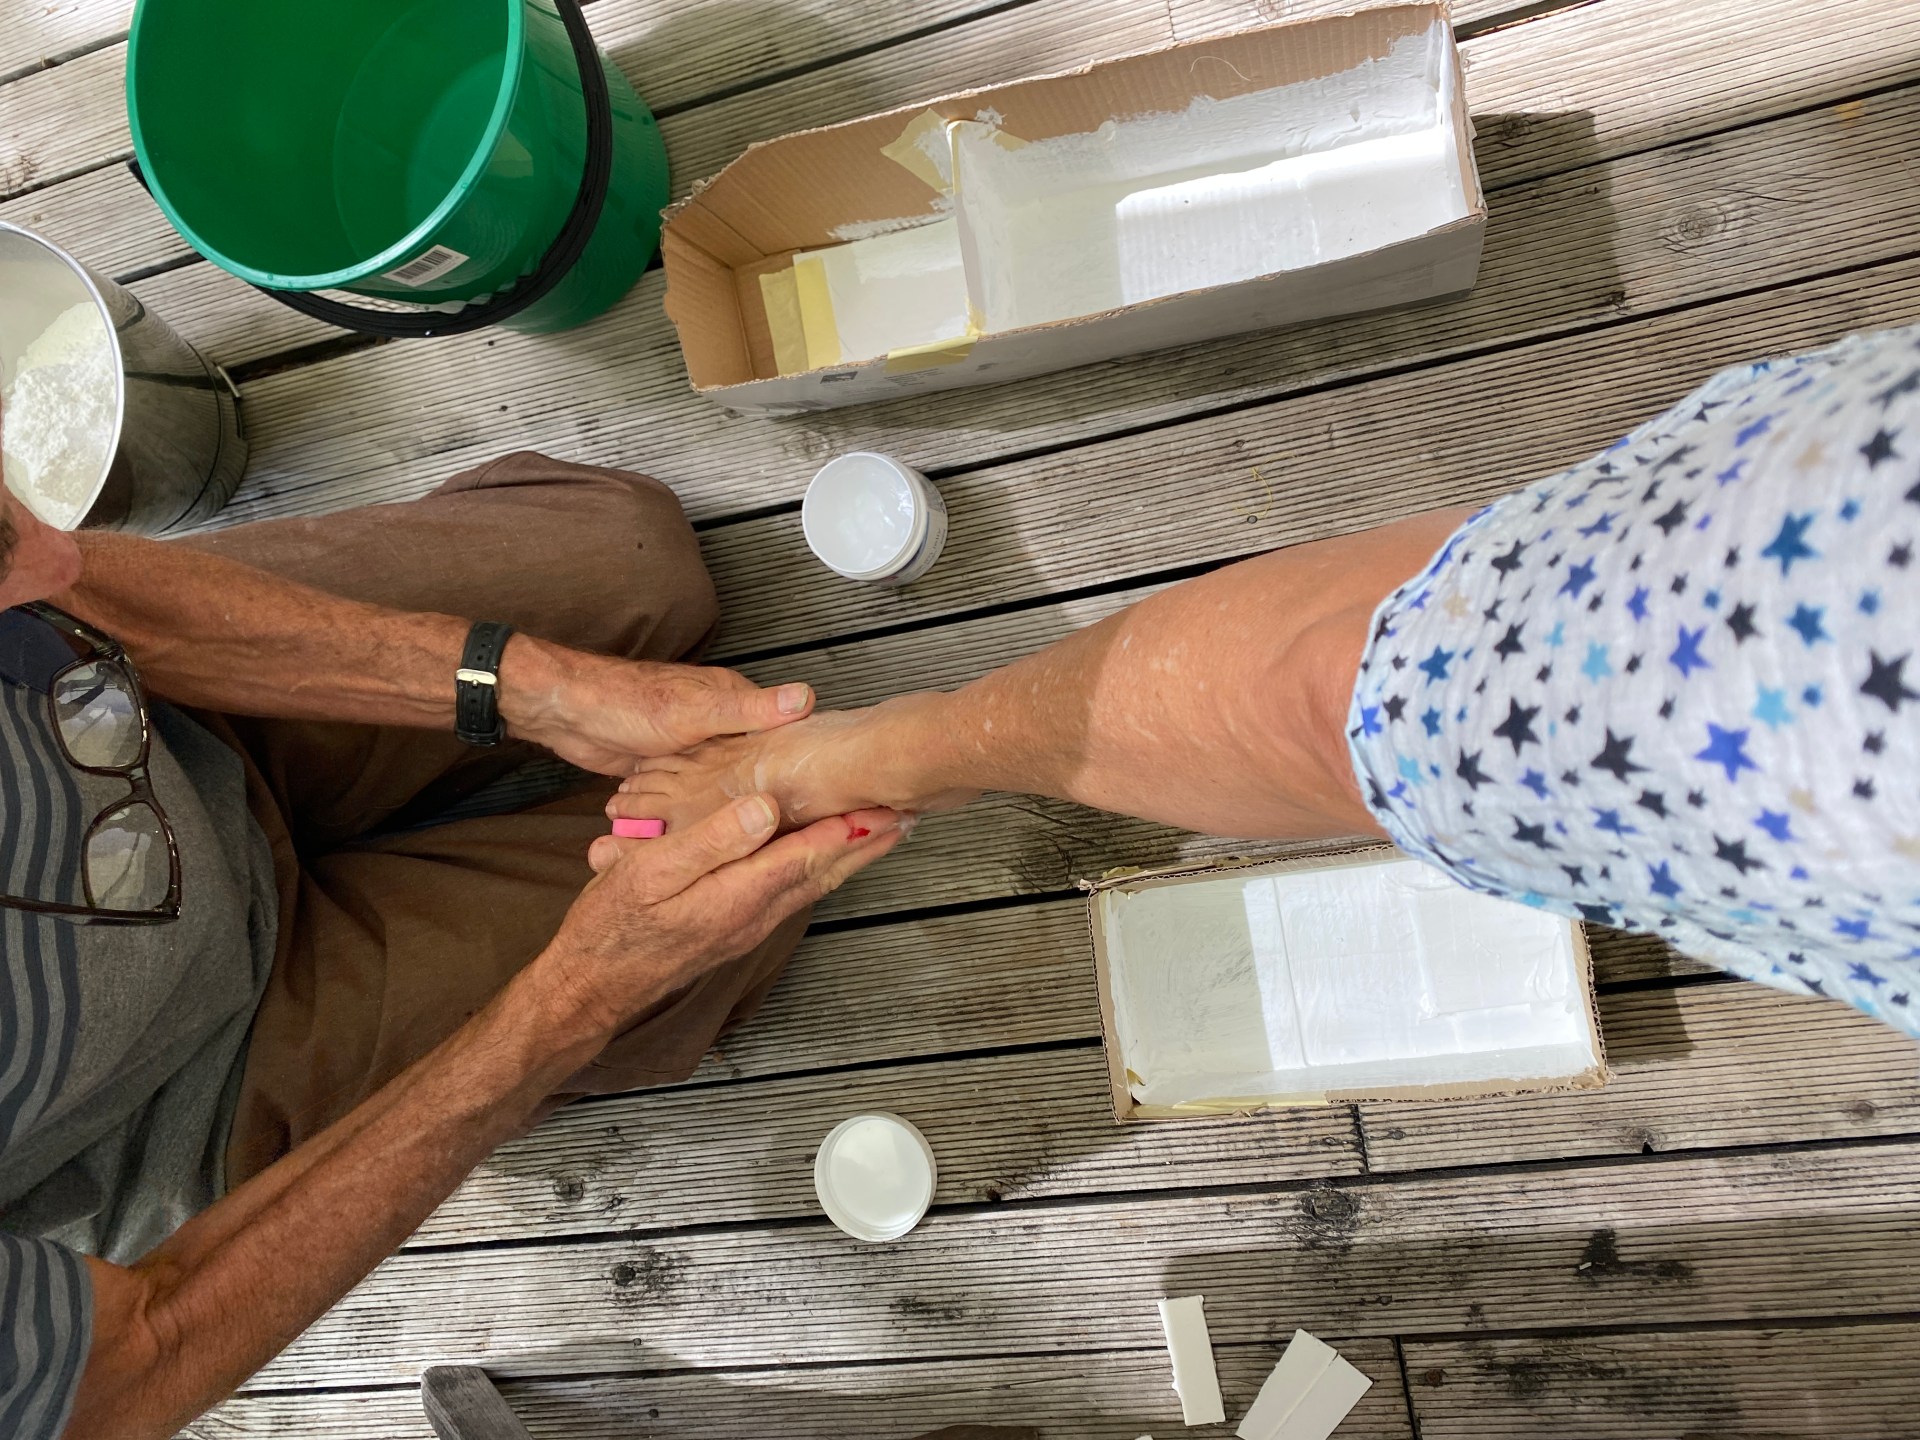
This is the first bag of alginate. It went all lumpy. It sets really fast and should not look like this.

It should look smooth like this one.
Mark got out the big guns for mixing!

and it’s beautifully smooth. But we had air bubbles, which shouldn’t happen.

I only had to stand for about three minutes before it was set.
See the air bubbles? Caused by the mixing process. I’m not sure how you could mix a whole bag without getting air bubbles though. 
And we have a pair of moulds!

Back to Bunnings for plaster of Paris, which again got mixed with the big mixer and then poured into the moulds. 
Here they are sitting in the sun in our back lane for a preliminary set. We then moved them to a warm spot for 24 hours. 
The moment I had waited so impatiently for. I was trying not to get my hopes up as I am mentally permanently scarred from trying to make a body double, and I didn’t want it to end the same way. 
So far, so pretty good.
I have a foot. The air bubbles have caused holes in the plaster, but that doesn’t matter at all.

A pair of misshapen feet – years of wearing high heels shows clearly. As does every wrinkle and vein, which is all very confronting! Please note that I have a gap between my toes for thong style shoes, the plaster had to be scraped out. 
Here are the halves of the two moulds. We thought we would keep them but they shrivelled as they dried and then went mouldy, so they went in the bin. 
And here they are! My feet in all their glory.

Mark loves them and having made a pair of shoes with them, I can attest that they work perfectly. The toe piece looks like its in slightly in the wrong piece and that’s exactly what’s happened. I followed the pattern instead of checking the position on my own feet, however, it moved into a better position as I wore the shoes.

This is the Atelier Louise Silver Sands Sandal, which I really like.

Katherine and I showing our finished sandals.

I decided that I really needed a denim pair, so I wrangled the pattern pieces from the scraps from some jeans that I’d made my denim wreath from.

I haven’t worn these for any distance yet and don’t want to get them grubby by wearing them around in the bush, but first impressions are that they will be really useful.
I have more planned so stay tuned!
This was a fascinating read and I love your resulting sandals. Well done! Regards Lindy South Africa in lockdown!
Thank you so much. These are a great lockdown activity, but you have to have the supplied to hand. Stay safe and well!
So creative Sue! Love your shoes!
Thank you so much Kaye!
Sue, you and your partner in crime are amazing!!!! Your craft skills are endless and I love reading all about your endeavours. Looking forward to your next craft adventure. 👏👏
Thank you so much Karen. I’m not much of a crafter, but I did enjoy making these!
Love this post and your feet! Like a sculpture. How did you get your feetbout if the cast, though?
Thank you Suzy. The moulds are still a bit wet, but quite solid (like jelly) when the feet come out and it sort of stretches as the foot comes out. Vaseline really helps too.
Your sandals are terrific! Thanks for the step-by-step pictures; I don’t know whether I’ll ever be this adventurous, but if so, I know where to look for guidance. Thanks for your blog….I really enjoy it.
Thank you so much Cate. You don’t really need your own feet to make these sandals. It’s quite difficult finding the soling etc, here in Australia, but now I’ve sourced all the bits there will be no stopping me and they are reasonably cheap to make.
These are fantastic 👏🏻👏🏻 well done to both of you!
Thank you Andrew. I still want to make sneakers like yours!
What great fun – and Mark is on in a million (but you know that)!
Thank you Kim, and yes, I do know that!
amazing – sounds like a lot of work but now so useful. your sandals are so cute.
Thank you Beth, they are not as difficult as you might think. Power tools are necessary though!
These are amazing Sue, so impressed! Love the sandals
Thank you Charlotte. They are quite easy and fun to make!
What a wonderful project. I love reading about your crafting adventures and what would we do without our partners? Love the outcome and look forward to seeing more.
Thank you so much Christine. I must say that I could not live without Mark!
So clever! You really make the best of physical distancing activities!
Thank you SaSa, I’m refusing to let the whole situation get me down!
Have so enjoyed reconnecting over on IG, and now here. As far as I know, there’s nowhere close for me to try this over here, but I’m eager for the opportunity. Someday! Are there options for making arch-supporting sandals and shoes, do you know? Sending you both hugs, del
Thank you! I’ve been thinking about this. If you had some old orthotics you could make lined inner soles and capture the orthotic in between the sole and the lining. It might work? Sending you hugs too in this difficult time Del.
Good thinking! Thank you so much for taking time to come up with possible solutions. Will keep them in mind. Meanwhile, enjoy your lovely creations! 😘😘
Thank you and good luck!
Reading with interest! Look forward to more adventures in shoe making.
I think your plaster feet look beautiful. They would make great bookends!
Thank you Liz, I have plans for these feet and bookends are just one of them! The sandals are so easy to make, with or without replica feet!
WOW! This would never have occurerd to me, but they’re awesome! What a cool ‘tool’ to display when not being used, too! 😀
Thank you so much! They are a bit scary, to be honest!