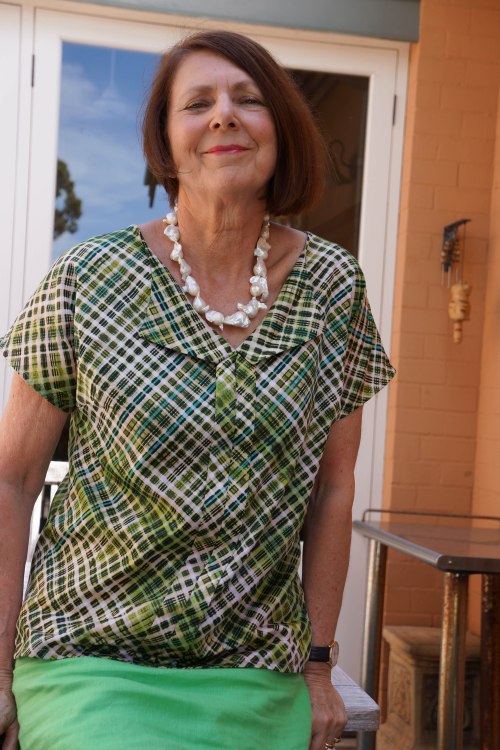
I totally forgot that I had this Weekend Getaway Blouse & Dress pattern until I had an email asking me if I’d like to write a review. Well, I’d better make the blouse first!
I duly printed out the pieces and then wondered if my printer had experienced a little hiccup. The numbers were strange and the pattern is put together quite differently from other PDFs that I’ve used. I worked out that numbers and letters formed a little square, but there seemed to be numbers missing.

I did appreciate the gridlines which made assembly much easier, but I spent some time puzzling over the layout. In the end I looked at the instructions and could see that the missing numbers had their own sheets of paper, which I had put aside without noticing, and that I only had to assemble 1, 5, 6 and 7, and then do a manoeuvre to make everything line up. This photo shows a piece of pattern sitting on its own – I had to cut it off and join it to a very different part of the pattern.

I think this is a bit odd and wondered if others had the same issue. Nope, appears I’m the only dope here! I must say that once I had worked this out, the pattern came together easily so it shouldn’t put anyone off.

The pattern itself is simple to sew, and the instructions are pretty clear though so follow them carefully and you won’t have any issues. The blouse has a little pleat in the back, which is a nice detail and which gives room without making the neckline and shoulders too wide.

I chose a beautiful cotton poplin from Potters Textiles. It has a lovely silky sheen to it, but it’s printed on the diagonal – which of course didn’t hit my frontal lobe until I got it home. Every pattern I wanted to use this fabric for had the dreaded “not suitable for diagonals” in the instructions. The Weekend Getaway Blouse had no such instruction, so I went for it, but really, it’s unsuitable for diagonals. However, I feel as though I got away with it.
I really must concentrate when I take the photos – I have a whole pile with chipmunk cheeks where I am gorging myself on something (probably chocolate!) and then trying to look innocent when the camera flashes.
When I made the blouse I had this funny little spot where the front and the collar didn’t lay flat together at the join. I fiddled and futzed about and then looked at the photo and realised that this was intentional.
I still felt a frisson of annoyance with it though.
When the day came to wear this blouse, I was making the bed and happened to look down and I could see straight down inside it to my feet! I was on my way to work and thought I couldn’t possibly live with full body flashing, so I whipped myself off to the sewing machine and raised the front split and then decided to stitch the collar down with a sort of mitre. I felt happier with this, but it probably does destroy the edgy look. 
My only other modification was to do a full bust adjustment. The pattern called for one of these for a C cup or above. Hmm, I’m a C cup so I did it for the first time ever. The instructions are really clear and I certainly have sufficient room at the front now. I had to fiddle with the darts a bit to get them into the right position, but that wasn’t too onerous.
Details: Top is the Weekend Getaway Blouse from Oliver & S, made from fabric bought at Potters Textiles as a remnant. Skirt is my self-drafted pencil skirt, shoes are Albano.


This is a beautiful blouse! The fabric is gorgeous as is the cut and style. Looks great on you.
This top and fabric are great together. You look so well styled.
I have had the odd ‘oh no’ feeling about the necklines on my tops too and have adjusted them in the morning before work.
You have just sold me on this pattern. I have been eyeing it off for a while but your version has convinced me. This looks like it would be ideal for work too. Love your whole outfit and your shoes are gorgeous.
I was hoping someone would notice my shoes because I love them too :). I can’t wait to see your version of this blouse!
Hilarious blog…. glad you are human after all. I saw you in person in this ensemble and the photos dont do it justice – it really was a sensational look. Those Keshi pearls add just the right amount of gloss. x
Thanks Gabrielle 🙂
Lovely blouse, the fabric is perfect and the style looks lovely on you.
This is great, such a simple shape but so effective with your beautiful fabric. I want one!
Thank you, I saw a very similar one with piping round the neck and armholes and a dinky pocket and thought I’d have another go quite soon.